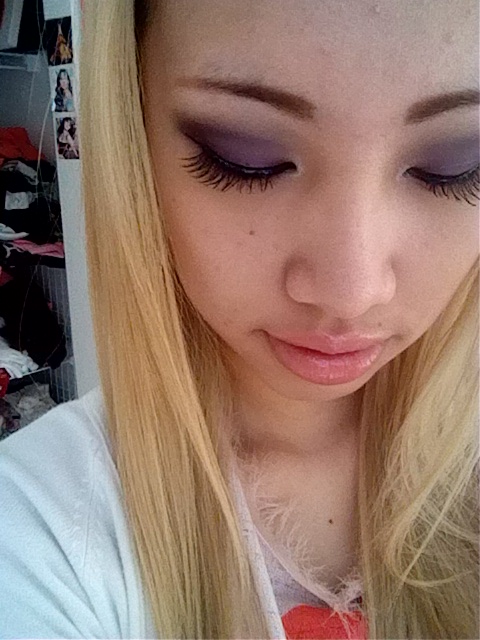
Showing posts with label makeup. Show all posts

Tuesday, 11 February 2014

Outfit post + Dinner at Cin Cin

Happy Family Day everyone!

I hope you all had a nice day off whether it was by yourself, with your family or with your loved ones. I celebrated with my boyfriend at a really nice restaurant on Robson in downtown Vancouver called Cin Cin. There was always good comments and good feedback on the place, but I never got the opportunity to go there until today. The service and food was definitely as good as what I had heard about previously. It's a place I would definitely go back to and recommend for you guys as well. Here are a few pictures of what we had for appetizers as well as our two entrees. Enjoy~


_________________________________________________________________________________

Outfit post:

Alright so asides from all the good food, of course I had to dress up for it as well. Honestly, I had forgotten that we were going to such a fancy restaurant, and just totally dressed casually until later in the evening when we were heading to Cin Cin that I realized I was probably a little underdressed. But not to worry, the place is surprisingly quite casual despite the fancy name. 

Here is what I wore:

Leather Jacket: H&M
Off shoulder oversized tee: Zara
Leather/cotton pants: Alice + Olivia


_________________________________________________________________________________


For makeup, there's honestly nothing that I love more than a bold liner and red lips. It suits any occasion, such a simple look but so feminine, and accentuates the best features on your face, the eyes and lips. 
Do you also notice my skin looks super flawless and airbrushed too? (Didn't use any photoshop by the way). I'm using Shu Uemura's new lightbulb foundation, which my review will be up soon! 
So stay tuned~

Here is what I had on my face:

Brows: Anastasia brow wiz and brow gel both in Brunette
Face: Shu Uemura lightbulb foundation + Illamasqua foundation powder
Eyes: Nars black eyeliner + Cle De Peau volumizing mascara
Lips: Stila liquid lipstick in beso
Cheeks: Nars laguna bronzer + Nars blush in orgasm


I hope you enjoyed this simple night out look! Comment if you have questions~
Have a good rest of the week! Thank you for reading


CarolYuu

Friday, 31 January 2014

Review: Nars Pore Refining Primer

Happy Chinese New Year everyone! 恭喜發財! Happy year of the horse (:

To those that celebrate, I hope you had a great dinner with your family and loved ones! Chinese New Year actually used to be kind of lonely here in Canada for me, because most of my relatives were in Taiwan. But now, most of them have immigrated here, so there is more to look forward to during CNY!

I thought I'd start off the new year reviewing my current go-to primer. The Nars (oil-free) Pore Refining Primer. Who wouldn't want a hydrating primer that will keep your makeup on all day? For somebody with such dehydrated skin like me, we usually don't like oil-free, but trust me, this controls oil, but definitely still feels like it's providing me with enough hydration!

I don't usually wear foundation, only concealer, bb cream and some powder to set. But this primer literally keeps the makeup on my face all day, and I only need to touch up or reapply when I've blown my nose or physically wiped off my makeup. If I don't touch my face, I never have to worry about touching any shine or oil that has broken through.

During application, you can immediately feel the relaxing and cooling feel of the light/oil-free primer. The gentle smell of lavender adds the perfect touch to your morning makeup routine.


Now for those that like to get a little more technical, here are the main ingredients in the primer.

1. Glycerin

This is used in many skincare products to attract moisture onto your skin, which helps to get rid of any dry areas and flaking skin. It was definitely a huge problem I had, and I had to go through many skincare regimes and foundation routines to find the most suitable one for myself. My makeup usually looked horrible because the dryness on my skin would accentuate the foundation around my forehead, and it just looked so bad. So for me, this helped my foundation/concealer stay on and fill in my lines without looking like it is just floating on top of my face!

2. Lentill Seed Extract

Lentill seed extract is an antioxidant that has anti aging benefits. If we are going to be having a base to help our foundation apply better, why not have something that will help prevent aging and help firm and lift the skin as well. An all in one product is always a plus!

3. Lavender 

Asides from camomile, lavender is another type of flower that helps to calm down any inflammation, redness or irritation. Keeping down redness will help even out the skin tone so that the colour of your foundation shows up better. Especially if you are in a department store trying to look for a foundation colour, if you have a lot of redness around your face, the shade matched could be inaccurate.

4. Silicone (Dimethicone) 

Most face primers are silicone based, because it helps to smooth out the skin, blurring out pores and fine lines. It does this by filling out the lines so that foundation can be applied smoothly. You never want your foundation to sit in the fine lines and accentuate them.


_________________________________________________________________________________


So seeing all the wonderful benefits of this primer, I even recommend it to people who don't wear foundation. Wear this primer as a base to help protect your skin, calm and control oil throughout the day.


This primer retails for $38 CAD, and can be purchased in Vancouver at any Sephora (or their online website: click), Holt Renfrew, The Bay and Murale.


Here is a picture of my simple makeup at CNY Dinner using the Nars primer as the base~

Have a good day everyone! And again, Happy Chinese New Year!!

Wednesday, 2 October 2013

Makeup post: Fall trends

With the Fall season just hitting, it's time to dress warm, and change up our makeup colours!
If you haven't already, let's take out the warm colours, browns, blacks, and you know, the new black of this year, ORANGE!

Yeah that's right, orange is the new black of the year, so besides the brown eye shadows and red lips, don't be afraid to pull out that orange eyeshadow (which I have done below), and orangey red lipstick.
What do I have in this look? 1) A matte complexion 2) Warm eyeshadow colours (yellow, orange, brown) 3) Matte red lips 4) Full, strong brows 5) Contoured cheeks

1) Ok, it's fall time, so time to put away your JLo Glow, and put on your matte face! Well, technically makeup shouldn't have any rules, and you can go do your glow if that's your thang I guess. 
But, I'm just telling you this year's trends ... So I put away my Nars Sheer Glow foundation, and took out my Nars Sheer MATTE foundation instead

Sorry for my oily forehead, it seems to have unfortunately taken away from the matte affect, forgive me. 

2) So carrying on, I combined eyeshadows from Mac in Gesso (yellow), Makeup Forever no.18 (orange), and Urban Decay from Naked palette 2 (brown). And surprise surprise, yess, they are all MATTE finishes as well!! I used the yellow and orange all over my eyelid, these colours were pretty much chosen to resemble the fall leaves falling off our trees. (surprise surprise) I used the brown all over my top lid and crease to create that more wide eyed look. 

3) For my lips, I'm using Stila's liquid lipstick in #10, aka Beso. This is one of the best and long lasting lipsticks that actually stay without staining and is a pain in an ass to remove. Nope, once it becomes matte, it becomes kiss proof. Next time you drop by a Sephora or something, try putting it on, allow it 30 seconds to dry, and then kiss your hand. I guarantee nothing is going to transfer over. So I guess it's boyfriend friendly too. The only thing you have to make sure is to not get it wet, so I probably won't guarantee a happy ending if your kiss is too wet........ haha anyways moving on...

4) As usual, for my eyebrows, I'm using Anastasia's brow wiz twistable pencil in Ash Brown to fill in and shape my brows. To set, I used the tinted brow gel in Brunette just to keep all my eyebrows in place, and so the colour does not get wiped off so easily. Using that mascara wand in the brow gel will also help to groom and comb down the fine hairs.

5) Lastly, on the contour of my cheeks, I used my favourite go to bronzer that I use all year long. It is the Nars bronzer in Laguna. It generally is matte, but it has a few signs of sparkles if you play with it on the back of your hand. But once it's applied on to your face, you really don't see it anymore.


This is my current everyday look for the fall, of course once in a while i'll be lazy and just use neutral browns on my eyes, or darker berry colours instead of bright reds on my lips.
I hope you guys enjoyed this simple look. 
Stay tuned next week, I'll be doing a look inspired by Kpop star Ji Eun from Secret for her new solo music video. 

Let me know how you liked it, and what other looks you want to see!
Now enjoy these pictures of my cute puppy~


-Carol


Tuesday, 13 August 2013

New hair & updates (braid obsession, Cle De Peau)

Interviews, projects, work, I need a day of break!! Well, I finally do get one next Sunday, I'm totally looking forward to that next week... but as usual on my days off, I'll literally just sleep in, do nothing, pig out on my bed, and sleep early. Honestly, that's what a comfortable day off sounds to me right now..because I have too little energy to do anything else anyways.

Last week, I kind of got a day off I guess, I had the whole morning off, until later in the afternoon when I got called in to work because of a big launch (that didn't even turn out to be as much of a hype as the company thought it would be). So I took advantage of the day off and went to get my roots touched up finally, my hair re-toned, and went for a nice walk in Yaletown.
As usual, I went back to Muse Hair Salon located on Cambie Street between 14th and 15th, returning to my trusty hair stylist Sally. Blondes are usually super hard to maintain, and dye evenly, but she does a great job every time! This time, we did a bit of a more darker ash brown as well, but it usually does fade into a lighter ash blonde by 2-3 weeks of wash. After a relaxing day at the salon, she finished off my pampered salon trip with beautiful beachy waves, and waterfall braids. Oh I'm still killing myself learning how to do those cute braids! And yes, they are also a current obsession for me... french braids, fishtail braids, and now these waterfall braids.

How can we not end a hot summer day without beers at the patio? That's obviously what I did before we headed down to the gorgeous summer seawalk at Yaletown Roundhouse. Summer feels to short...we literally have less than a month left.. I wouldn't say I wasted it, but I spent way too much indoors doing homework, going to school, and working. Next year, I can see myself working my way to the top, doing a full time job, and still moving up like I always push myself to do!


Oooh, as you can see, I did a fishtail braid today (continuing with my current obsession), and even when I'm just standing/sitting there doing nothing, my fingers just automatically start braiding. That's how much I've been doing it... but still sucking, there are days where I take an hour trying to figure out how to do a braid, and just unraveling it in frustration and putting my hair in a high ponytail. This is a picture of my little camwhore session before leaving for work. Today was a hot sunny day, of course it would call for a cute fishtail braid and a boho chic top from zara! Yes.. ignore my little sister at the back, she just likes getting into my photos all the time, at least this time it wasn't with her feet up or something crazy haha! 


Here's just a quick snapshot of today's makeup. As you can see I look a lot lighter than my usual days..and that is due to me trying some new products. I decided to try some Cle De Peau products, which to my surprise brighten your skin more than anything I've ever seen! You know them Asians and liking their complexion to be super light.. and being a CBC, I'm totally not used to that. I'm usually more into that tanned sun kissed glow. But I like experimenting.. so I thought I'd try. It literally was just the makeup base that made me this white, because I only put a thin layer of powder over it, which looked darker than it really turned out to be. As you can see I tried to bronze the crap out of my skin to make myself not so ghostly...Well, at least it made my skin super smooth and healthy. 
Cle De Peau sounds like a really luxurious brand, and  I'm looking forward to trying some of their other stuff, so please look forward to seeing some of their product reviews from me!

Thanks for reading, it's time for me to get to work! 

-Carol


#nowplaying: Holy Grail - Justin Timberlake ft. Jay Z


Friday, 2 August 2013

It's a no makeup makeup look + pop of red lips!

Being in raincouver, it really does become a problem when you're trying to figure out with what to wear. Some days it may be blazing hot, and then it suddenly becomes winter weather pouring rain the next day. It makes your wardrobe so difficult, and when I leave the house I am not afraid to wear shorts on a sunny day, because it may start raining in the afternoon. I am also afraid of wearing a jacket on a rainy day because it may suddenly become like 30 degrees when it reaches the afternoon. What do I do!!!

I guess my solution has just become to wear light, and bring a cardigan. They're easy to carry, if it gets to hot, and when it's a little chilly, they'll keep me at least warm enough.
Today being a gloomy day, aka your typical Vancouver weather, I really wasn't in the mood to put on makeup. But, being a fashion student, and working in the cosmetics industry, it really isn't that easy to go out with my naked face anymore. Instead I decided to be trendy and do my no makeup makeup look ha! With, of course my favourite classic red lippy.

I've always loved Bite lipsticks, but the one I used for the first time (and love love loved!) is the exclusive one that only the one and only VIB Rouges from Sephora receive in their little congratulations kit. Obviously I've spent over $1000 in the last year... its only August ....what will happen to me in December???


Oh please excuse my beautiful roots, they will be touched up next Friday, and hopefully with an exciting new tone of blonde as well, yay :D 
So today, it literally took me about less than 10 minutes to do my makeup, and this is what I did.

1. SPF of course! Can't leave the house without that. Even when the days are yucky and cloudy, the sun still peaks through, and still damaging for our fragile skin. Especially that my skin has just been recovering lately from my acne outburst from the last few months. Read my post about how I treated my longly irritated and nasty acne here. Today I used my SPF 50 from Estee Lauder. It's super moisturizing and really nice for sensitive skins. It kind of has a bit of a green hint to it because cucumber is one of its ingredients, so it gives it a nice fresh smell instead of the yucky usual sunscreen smell. 


2. Next on the list, I applied my favourite Benefit Stay Flawless 15 hour wear primer that magnets your foundation or any complexion products right on to your face. It's perfect for that summer beach day where you don't want all your foundation to just sweat off. Even if you go to Asia, or those extremely humid locations for your vacay, you're going to want this primer to keep your makeup in tact. Even though Vancouver weather is pretty dry, I just like to have this on so that I don't have to keep touching it up throughout the day. I usually don't anyways... so if there is a product to prevent me from having to touch up my makeup, I need it! The plus size for buying it is also the extremely cute packaging that goes with Benefit's foundation collection. 


3. I don't have a picture of this one, because I actually took a sample of it home from Sephora. So always hearing all the rave about the Nars Sheer Glow foundation, I never cared to try it until now. I have to say, it really is an amazing foundation. It gives a light to medium coverage that is so natural, it really gives you that no makeup makeup kind of look. The consistency of the foundation is very liquidy, and doesn't give you the sticky feeling after you apply it at all. Of course, I like the healthy glow and dewy kind of finish, so the Sheer Glow line suited me well. If you're the type of person who doesn't like that nice shine, they have a second line of foundation called the Sheer Matte. Try that instead, you'll probably like that a lot better. The good thing is that even though it gives a matte finish, it won't dry out your skin, so don't worry about that!
I applied the foundation using Sephora's Pro Finish brush in #55. This brush gives your skin a nice airbrushed finish, and if you wanted a bit of a heavier finish, you can go ahead and use the classic flat foundation brush instead.

4. The Bite lipstick from the VIB Rouge packet is this cute little mini size! So for those who are not familiar with Bite products, they are absolutely phenomenal, and you should definitely try it if you are a lipstick lover, and haven't tried it yet. Why should you try it you ask! Well! I'll be glad to answer that curious question of yours. It is a completely natural and cruelty free lipstick that uses colours from natural fruits. In other words, its a lipstick that is healthy for you to eat. That's very important for a lipstick, because how much of the lipstick do you apply that ends up on your food or in your mouth when you lick your lips? Yupp, that's right, if the makeup product is something that you are constantly eating, you really want to find something that you can actually eat, and not just always swallowing a bunch of chemicals and artificial colours. Did I mention that they're super pigmented and last alllll day??


5. To add a bit of colour to my face, since I used a very bold lip colour, I don't want to leave out my cheeks, otherwise I'll look super flushed and sick and pale. Here, I'm using the blush and bronzer trio from Nars, I'm only using the Laguna Bronzer. It's a really nice and light milky brown that doesn't add too much definition to my fair skin. It has a tiny bit of shimmer, but is not so visible once you apply it on to your skin. 
To apply, I used the E.L.F slanted bronzer brush. I like using this one because it gives me a lot of control, as the shape of the brush goes perfectly along under my cheekbones. 


6. Lastly, I can't forget my eyebrows! I'll look like a zombie or something if I don't have them on, and people will run away from me if they see me.... Anyways, I'm using the Anastasia brow powder duo in the colour blonde. Most of Anastasia's brow products are either waterproof or are super longwear, so if you have no eyebrows or little eyebrows like me, I really recommend their eyebrow line, because they LITERALLY stay on all day. Unless you roll around in bed with your face in your pillow...then I guess you should use brown gel instead haha. 

So anyways, this is my final result, a nice natural school day kind of makeup that is appropriate for those lazy bums that want to add a bit of glamour to your day, but not having too much on. If you're someone who is used to having bold makeup, I dare you to try this! I believe that every girl should have a red lipstick as part of their accessories. 

Thank you for reading, and I hope wherever you are that it's not raining like Vancouver... unless you're here, then I guess you have to suffer with me... Bye!

-Carol


#nowplaying: City of Dreams - Alesso 

Tuesday, 25 June 2013

BB and CC... a popular question, what is the difference??

Starting from Asia, BB creams (Beauty balm or blemish balm) became the number one selling skincare item! Its innovative formula that wowed everyone slowly crept its way into the North American Fashion and Cosmetics scene. In the last year, almost every line including Too Faced, Clinique, Smashbox, Boscia, Bobbi Brown, Dr. Jart, Dr. Brant, Peter Thomas Roth, Dior, Stila, Dr. Murad, Lancome, and so many more to list have released one. The reason why it is so popular is because its a super quick and easy application and has multiple benefits so that you can do everything in literally just one step. Now I know there are also BB haters, and usually those are the people that prefer a more fuller coverage. But on your days off, why not let your skin breathe with either nothing on, or a BB cream that makes your skin imperfections look blurred out, but look like you have nothing on.
I personally am a BB lover, so I could go on and on about how much I love it. You can find BB creams which are more of a lighter coverage and focus more on its skincare benefits and sunscreen protection, while others who like to focus more on coverage and smoothing out those fine lines.
Just very recently, brands started to release CC creams, which stands for colour correction or complexion correction. And I know everyone says this.. but wait till the DD, EE, etc... and I've already heard rumors there really is a DD cream coming out xD I read it on Michelle Phan's blog, and I am waiting for it to come out. Alright, so today's big topic is... what is the difference between a BB cream and a CC cream? I'll let you know the differences, and benefits, so you can choose to see what is more suitable for your skin types and what kind of coverage you would like.

BB creams:

- Have sun protection (of an SPF from 10-50)
- Helps to blur out wrinkles, blemishes, pores and imperfections
- Light weight, with a natural finish
- Easy and quick application
- Very hydrating
- Act as a perfecting primer
- Some are rich of antioxidants (ex. Boscia BB cream)
- Is a skincare and makeup all in one


CC creams:

- Helps to heal:

     - Dark spots
     - Hyper pigmentation
     - Redness
     - Dullness

- Contains sun protection (because if you want to correct, you need to protect as well)
- Very hydrating
- Light weight, with a natural finish
- Easy and quick application
- Is a skincare and makeup all in one


Alright, so now that we've laid out all the differences and similarities to the two amazing products, the next question is... how do you know which one is more suitable for you?

Ask yourself these questions...


1. What is your main skincare concern/concerns?

a. For treating/covering up fine lines and wrinkles - BB cream

b. Treating dark spots/ sun spots/ hyper pigmentation - CC cream

c. You are someone who is busy and needs some sort of coverage, but something fast - BB cream

d. You have large pores - BB cream

e. You have redness concerns, and is very sensitive - CC cream

f. You want makeup that will also help to hydrate - BB or CC cream


Now that you've chosen your main concerns and are now much more familiar with this current trend, go ahead and give it a try! If you've already tried it and didn't like it, I dare you to give it another chance. If it was not enough coverage for you, try something with more coverage, like Smashbox and Clinique. If you thought it was too oily for your face, try an oil free BB cream like Boscia. Figure out what wasn't working out for you, and what you would like in your products. Do a little bit of research so that next time you go shopping for cosmetics, it makes it easier for both you and the person who is helping you out.
Skincare and makeup is probably the best accessory you could add on to your whole outfit!

Have fun trying out and playing with this trending hot item! See you soon.

- Carol


#nowplaying - Tomorrow: Tablo ft. TaeYang


Sunday, 16 June 2013

Completed photoshoot - pinup and super hero inspired!

Hey guys!

Remember couple weeks ago, I blogged about my styling project that was inspired by pinup girls, superheroes and all that jazz? Well, I finally received my pictures, completed my project, so sorry I wasn't able to upload the pictures until now. It was super fun to do the photoshoot, and it was absolutely a pleasure to work will everyone, whether it be the model, photographer or the makeup artist. Everything ran smoothly, and we were able to finish an hour early than the predicted time which was awesome! The people that I worked with will be credited at the end so stay tuned (:

Pinup inspired:


This is the photo that I chose for the final look and put on my project. I did adjust the photo a little bit, because she was kind of leaning against her arm a bit, so I got my friend to help me edit the photo to bring in the sides a little bit. The top that I used for these series of photos were actually from a vintage store downtown, and I was super lucky to be able to find it. It was so hard being able to find a corset that was the very classy kind of look I wanted. I kept finding ones that were either super trashy or costed like $300, which I wasn't able to dish out at all. And a corset being a lingerie piece, I believe it was non refundable.
But since the one I got was vintage, I still had to keep it, but $40 was nothing, so I won't complain. For the bottom, I chose for her to wear a sheer chiffon skirt that was higher cut on the front and longer at the back. The shape of it made her legs look even skinnier than they already were and elongated them as much as the heels did.

The day before the shoot, I was absolutely stressing out, and super terrified because I had no idea what to expect. But the moment my model sat on the floor and started shooting, I could feel a sigh of relief, because my model already absolutely knew what she was doing with the reference pictures that I had given her. The photographer was also very helpful with helping to adjust her poses and took beautiful pictures from different angles and using different props for effects.

Next, this is the super hero inspired:


Here is the final photo that I used for the second look. It was just a super sleek, sexy and leather look. A super hero I would relate her to is someone like the Black Widow, Natasha Romanoff. They both kind of have this sexy but a powerful look to them, and that was exactly the kind of look that I was looking for. And I just decked her out with a bunch of Sexpot Revenge accessories to emphasize the look even more (courtesy of my best friend who was once super into punk). 

Here is a focus picture on her makeup:


For her complexion, we just gave her a nice flawless face with a dewy finish. Using light contour on her cheeks and highlighted her cheekbones for that illuminated look. For her eyes, we did a bold crease cut using a champagne colour for the base, and a dark purple for the crease. We kept it a matte finish with no glitter or sparkles. To add even more drama to her eyes, we double stacked lashes. Finally for the lips, we used a powerful and bold red to define her beautiful full lips. 

The first and second looks were both the same makeup, except the second look we adjusted the eye makeup a little by adding the halodium powder by Makeup Forever to add the extra glamour to her look. 

The photoshoot was absolutely successful, I was super happy with the results, thank you so much for everyone who helped out, it wouldn't have been possible at all without you guys! You have no idea how relieved I am to have finished it. Now I got this huge project off my chest, and I can work my butt off for the rest of the remaining semester. Just two more semesters to go! I can do it!

My lesson learned from this shoot is that even though it's something that you've never done before but it's something you love, just be confident and do your best. Even if it doesn't work out the first time, it will in the end. So just keep trying and trying and trying! Through all the struggles I went through not being able to find a location to shoot, not finding the clothes I needed, i had a beautiful photoshoot that was completed. So remember, when there is a problem, stay calm to resolve it, because when you're frantic, you'll never be able to think of something when your head is a mess. So good luck to everyone with everything you do! Stay positive!

Thanks for reading everyone!

Oh yes, I didn't forget, all the people I worked with are Vancouver based, just in case you were wondering.

Credit listings:

Photographer: Matthew Burditt
Stylist: Carol Chen
Model: Stephanie Twarog
Makeup artist/hair stylist: Andrea Szeto

I hope everyone has a wonderful and sunny day! Cheers!

-Carol


#nowplaying: Trap - Henry (on repeat lol)

Thursday, 9 May 2013

The life of a tired college students... how to brighten up that face!

Hello everyone!!

Going into my second semester it has been more hectic that ever, and I literally have been getting an average of 3-4 hours of sleep. The fact that I have to work all the days I am not at school doesn't really help either. I shouldn't complain though, because working part-time really helps me to manage my time a lot better too and I don't procrastinate as much. If I were to stop working and have all this spare time to do my homework, I definitely would leave everything to the last minute. I know it is really boring, and every time I begin my new blog entries with a short complaint about how tired I am every day. A few weeks ago I met up with a friend who told me that he had been going to school full time, going to work basically full time, he was going to the gym for three hours every day AND he took up two martial arts lessons and one dance lesson. That made me re-think about my life, and maybe I should be doing something more and manage my time better. All I am doing is school and work.. and I am already complaining. I should at least start running a couple times a week to maintain a better health as well. Even lately my pimples have been coming back out again because of my lack of sleep plus stress from school. I really should start living life a little bit more positive (:

So with me being one of those super tired college students, I decided I'm going to teach you guys how to fake that awake look! Obviously I'll still encourage you to sleep lots to prevent those dark panda circles, and drink lots of water to keep that complexion hydrated. But... if you're super lazy and busy like me, here are instructions on how to fake it!

So with all that dull skin around your eye area and in your whole complexion, the concealer is honestly going to be your best friend. You can either use a brightener or an under-eye concealer to brighten those dark circles to give yourself a more refreshed and awake look. I am currently using my Nars creamy concealer in custard. Go and read my previous entry on it if you want to know how it is like. It is an eye cream and concealer in one, and it comes in 10 shades!


The second thing I like to have is a BB cream (Beauty Balm). I am currently using the Clinique BB cream with an SPF of 30 and comes in three shades. The reason why I would avoid a full coverage foundation is because being so tired and stressed all the time, my skin is already getting all that bad emotions from my body.. I really shouldn't shock it even more with a foundation. Even when I go to work, right now a BB cream is already good enough to help even out my complexion. The concealer is already good enough coverage for me to cover up any small blemishes. You can go ahead and use a more full coverage concealer if you need it. BB creams are also good because they help to hydrate your skin and gives you good sun protection, especially this Clinique one. Most of them are around an SPF of 10-15. The highest one I have seen so far is the Estee Lauder one which has an SPF of 50. I still haven't had the chance to try that one yet, but as of now the Clinique one is my favourite one. If your skin already is looking even and you don't need anything for your complexion, you should definitely still have an SPF. I can't stress enough how important sunscreen is, because UV damage is actually one of the biggest damages to aging skin. So you can say that sunscreen is probably the most effective antioxidant. Many people don't know how damaging the sun is, so now you know (:

Next is an eye cream! I think this is going to be your second best friend next to the concealer. I am using the Algenist eye balm. Even though coverage is important, helping to reduce and prevent is important too. Because the skin around your eyes is the most sensitive part, you must take care of it as early as possible. Even though I am still 20 and still don't have any signs of aging, I still put on eye cream that helps with dark circles, puffiness and wrinkles. An eye cream is also extremely important because it helps to hydrate the area around your eyes. Wrinkles are enhanced when the skin is dry. So keep that area moisturized! Even if you are using a concealer like Benefit's fake up and Nars' creamy under eye concealer, you should still add an eye cream to add that protection. More is never going to harm your skin (unless you're 20 and you're using anti aging products for 50 year olds, then you might be overdoing it a little...).


This is optional, but if your complexion still looks a little dull after you're done with BB cream or foundation, add a little bit of bronzer of blush to give that nice natural glow to your complexion. I am using the Nars orgasm blush. It is a beautiful pink/peachy blush with a orange undertone (which makes it look absolutely gorgeous on asian skin tones). It also has a little bit of gold shimmer in it that makes it act as a subtle and beautiful illuminator as well.


Lastly is something to help brighten your face, either a serum or a peel. I am currently using Dr. Dennis Gross' alpha beta peels. They are honestly the most amazing things I have ever used. It helps to brighten your whole complexion, helps with discolouration, black heads, wrinkles, pores, acne, acne scars, and literally anything you can think of to help your skin. It is super easy to use, it is a two step peel system. Step one is to help exfoliate and take off all that dirty build up that clogs your skin throughout the days because of the dirty air. Step two is to help neutralize the peel and stop it from eating away that dead stuff. I always say that no makeup is more beautiful than beautiful skin. After you use this, I swear it will change your life. It honestly is ok for all skin types even if you are sensitive to the bone!


Anyways, that is all my tips for a tired college student who needs a little bit of help with maintaining a healthier (or faking) look.

Armin Van Buuren was just here last week. Here is my makeup during the concert:


I am using Urban Decay's vice palette as usual and Hourglass liquid lipstick in "child." Also can't forget those falsies that I get in Taiwan for super cheap ^^~

Thanks for reading! I hope everyone is able to enjoy the sunny weather and not be stuck inside school and work all day long...

- Carol <3

#nowplaying: take the world on - 2NE1 ft. Will.I.am


Tuesday, 23 April 2013

summer is getting close... time for a review on Nars' new creamy concealer (:

Hi everyone!

I've been so busy with final projects, school, and especially work, I haven't been able to do a new review. Work literally has been super hectic since there was an event! I even had to get called into work on school days (which I usually don't do) cuz the days would just be way too long. Well, I did that, and was about to over time to 10 hours yesterday, but thank god the day started to slow down, so I didn't have to stay.

So the summer weather is starting to show up, and I am more than excited! Except because of my one year program, I don't really get a summer this year ><''. Oh well, at the least the sun will accompany me to school every day :D I already whipped out my maxi dress yesterday...


and my makeup too :) I absolutely love Tarte lipsticks, they're the only lipsticks that don't make my lips look completely disgusting (cuz of my super flaky and dry lips). So if you have chapped lips like mine, Tarte would be my number one recommendation! Not to mention, this infrared rouge is the thing for Spring 2013.

Alright so enough about me, its time to look at Nars' new creamy concealer!! I have been waiting for it for the longest time, and I finally got it yesterday! Obviously, the makeup addict I am... I had to put it on right when I got home... and I have to say, it is absolutely amazing! This concealer is an awesome makeup and skin care in one. 


What is so good about it?

1. I have a combination skin, and it was able to give a nice matte finish without powder. (Give it about 20 seconds to dry)

2. It was super moisturizing, and made it extremely easy to apply without having difficulties to blend it out. So in my opinion, I definitely loved it much more than the original concealer. 

3. Extremely long wear and did not crease. (I had it on for a full shift at work from 9:30 a.m - 6 p.m, and I still had it on till about 8 p.m)

4. Does not accentuate your fine lines around your eye area, and fills them in. 

5. Has a medium - full coverage, and will hide your dark circles with only a few dabs of the product.


How does it do its job?

1. It includes an ingredient called Silica. This is what helps to reduce the wrinkles and fine lines around the eye area in time. 

2. Titanium Dioxide (sunscreen). When you are treating any part of your body or face, it is always important to protect it also from sun damage. Sunscreen is the best antioxidant and anti aging product there is, because most of the damage in our skin... whether it be sun damage or dark spots, most of them are caused by the sun. Asides from protecting your skin, this is also what will help even out your skin tone.  

3. Bark Extract. Is what will help increase the hydration around the eye area


This is what it looked like right when I applied it using the concealer in shade custard. (Left eye with concealer, right eye without). I don't know why my nose was so red this morning... 
I used it on some of my pimple scars, and it hid it pretty well. But that's only because it was pretty light already. If you're somebody who only has minimal imperfections on your face, you could use this as a concealer for your acne or scars as well. But if you're somebody who needs a full coverage concealer for acne, I recommend using either Makeup Forever's Full cover concealer, or Kat Von D's lock it foundation and tattoo concealer

I give this concealer a 10/10! Because what's better than something that will heal AND cover? 

Thank you so much for reading.

I hope you will love this product as much as I do!! 

Have a good day, and I wish everyone's day to be filled with sunshine!

-Carol 


#nowplaying:  Can't hold us - Macklemore


Wednesday, 27 March 2013

First review: Benefit's FAKE UP!

Good Evening Everyone!!

This week has just been exams and projects for me... so I'm super tired, and glad that I can finally sit down to have some of my own time. Actually, I really should be studying right now for another exam tomorrow.. but I've been working my butt off the last few days, I think I deserve some sort of a break (:

Anyways, the product I am going to be talking about today is... Benefit's new fake up!
Okay, so weeks before the product launch, people were always asking about them everyday! They have read about it online, on Benefit's website and all that. Even when they came into stores, they literally FLEW off the shelves like there was no tomorrow!

So what is FAKE UP you say?

It is a concealer and eye cream/gel in one (:
prettyyyy unique and interesting concept I would say.

So as you can see there is a clear gel around the concealer, which has two main ingredients: Vitamin E which act as a really good antioxident to help prevent aging. It also has apple seed extract which is what helps to brighten the eye area to help improve and lighten those tired looking dark circles.

So what do I think about the product? Mmmm my honest opinion is that I would probably give it a 7/10.
My reasons?

Okay, so since we've kind of gotten to a bad start with it... lets start with the CONS and work our way up to the PROS, and see what you guys think?

CON number ONE!

Alright, so on the label, it says its supposed to have a nice "dewy" finish. It also said its supposed to stay hydrated and does not crease. So ok I get that concept of having a dewy finish. But the thing is that even though I try to set it with powder and everything, it literally creases soooo easy, I just cannot touch the area under my eye at all! And also because of its "dewy" (and wet) finish, it also causes the mascara that I coat my bottom lashes to transfer onto the skin under my eye even more. Trying to keep the mascara from running from my bottom lashes is already bad enough T________________T

ok so that is all that I have to complain about the fake up pretty much, now here are my cons..

PRO number ONE!

The gel around that concealer really does work, and helps with my dark circles. Being a full time student while working part-time, sometimes really doesn't get me much sleep even if I wanted to *cries*
That's why this is an amazing product for me (:

PRO number TWO!

It's very easy to carry in your purse to take on the go! You can jut directly apply the concealer under your eye then blend using your fingers or a concealer brush, which I like to do (unless you are helping somebody else apply it ^^~ then you would just scrap a bit off and apply using a concealer brush or with your fingers)

PRO number THREE!

The formula really is hydrating, and won't' leave your under eye area feeling dry and cakey. The last thing you want is to make the lines under your eyes even more visible!


And thats it! So my final verdict is.... that fake up is a mediocre product. Yes, It does really help with correcting dark circles at the same time being able to cover it up until it completely heals. At the same time, the formula is a little bit uncomfortable to work with because it is a little bit too dewy (for my liking), but who knows, maybe there are other people who like that texture. But that's just my personal honest opinion :3

For those that are interested, it is available in three shades and can be purchased in store at Sephora or on their website which has a Canadian website now woot woot.

Anyways, thank you for reading and have a good night!

Please feel free to ask questions below and make requests for me to review any other products!

Cheers (:

-Carol


Share on Facebook